I use a KBD67 Lite R3 (Model KBD67MKIIRGBV3) keyboard. It’s a 65% keyboard layout that’s hotswappable and comes with USB C. I have GMK CYL Dots 2 Light keycaps, which I enjoy because they’re legendless. This means I’m free to experiment with swapping around keys in software and don’t have to worry about the physical keycaps not matching. I use HMX Hyacinth linear switches on my stabilized keys and Cherry Browns everywhere else.
I highly recommend picking up a keyboard that is VIA/QMK compatible. It allows you to use free, open source software to remap your keyboard to your heart’s content. The rest of the details (apart from layout) like keycaps, switches, and being hotswappable won’t impact your productivity significantly.
My VIA configuration uses 3 layers. Download link
Layer 0

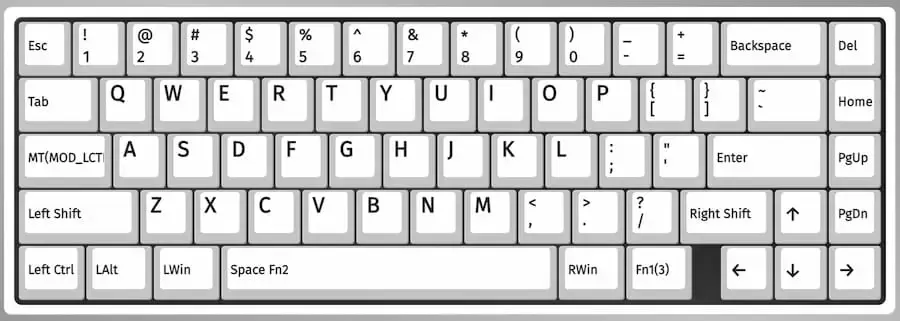
- Caps Lock now acts as Esc when tapped and LCtrl when held. Here’s how you set up this behaviour with VIA.
- Swapped LWin with LAlt.
- Swapped RAlt with RWin.
- \ | acts as ` ~.
- Swapped End with Delete and moved Home down a row.
- Grouped PgUp and PgDown together.
- Change Space to Space Fn2, which acts as Space when tapped and activates
Layer 2when held.
Layer 1

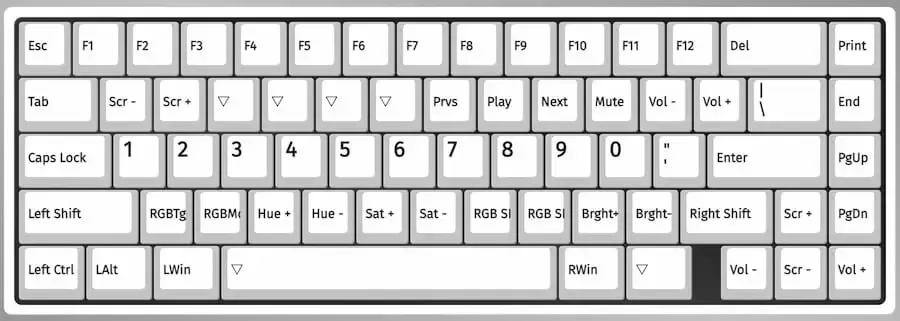
This layer is active when Fn1 on Layer 0 is held down. Notable features:
- Number row replaces home row.
- The shortcuts underneath the Function row are in the same order found on Apple’s official keyboards. The 4 empty keys represent
Mission Control,Spotlight,Dictation, andDo Not Disturband are missing because there’s no equivalent command in VIA. - The bottom row of the alphas are for controlling the lighting on my keyboard. I typically just turn all lighting off.
- Volume and screen brightness controls are repeated on the arrow keys.
Layer 2

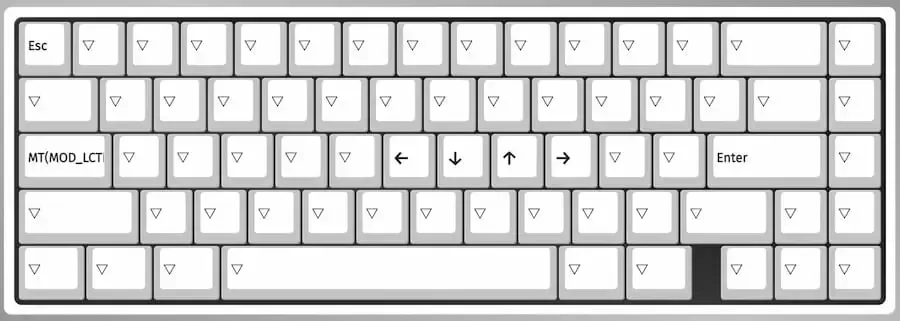
Active when Space on layer 0 is held down. This is a layer specifically for moving the arrow keys to the H, J, K, and L keys. I use it all the time in Finder…